Assignment 3 ---Documentaion
1. Nest We Grow /Model scale: 1:50
1.Prepare stage:
First of all, when I find this precedent, there is only part of the information in the picture. I need to record the dimension on the picture and build a digital model.
 |
| digital model |
After completing the Sketch-up model, I plan to consider the scale of this model. Originally, I was going to make a 1: 100 model. Because of the width of the column and the height of the model. If I keep on doing this scale, the size of the model is only 10cm*10cm*10cm. It was a little too small to make this model. After discussing the scale problem with the tutor about the width of the column and beam. Finally, I decided to make a whole model at a scale of 1:50. In this way, the width and length of the column can be calculated. The structure column will be 6MM so that I can directly use 6MM plywood to cut it as columns, and then beams is 3mm wide. This saves a lot of time in to buy materials. The scale at 1:50 is the most suitable scale.
1. Fabrication stage:
I'm going to divide the model into three parts. Concrete base, timber structure, and polycarbonate facade.
In precedent, the base is made up of concrete materials, and the function in the building is to block the wind passing through from the bottom without affecting the structure of the building, so as to protect the whole structure of the building. In order to reflect this material. I plan to use casting to do this base. It can make this model look more solid in the bottom part. I try a few different technical methods to model this base.
At first, I plan to use laser cutting to make a positive mold, including the part of the stairs and walls made of plywood. I only think that I can pour the mixture into the frame of the base then the result coming. Originally, I imagine that it is an easy way to do the casting. However, when I glued the pieces. I found that there was no way to fully glue together in the area of the stairs, and there were a lot of small gaps in the middle of the stair part that couldn't be glued together.
 |
| the positive mold |
 |
| the positive mold |
I showed my classmates the mold, which I had finished, and he said if I continued to use this mold, it is very likely that the liquid mixture would escape directly out of the gap without drying. This will lead to the failure of work. In order to make model, I've already spent 31dollars (16 dollars plywood + half-hour laser cutting 15 dollars = 31 dollars.), but it can not work.
Due to the problems with the previous mold, I had to give up the idea of making a positive part of the mold. Then, I plan to use 3D printing to make a mold so that I can do the casting. I convert the sketch up the model into the rhino model 3Dprinting. As shown in the photo, if the mold is printed out, it will be oversize like 22cm* 22cm * 6cm. For 3D printing, this takes at least 46 hours to print. Obviously, this method is not perfect.
Finally, I am reminded by my friend. Thinking differently, I can do a negative part of this mold. Using laser cutting and 3MM plywood to make a negative mold. Fee:16 dollars + 15 dollars (half-hour laser cutting).
 |
| the negative mold |
After testing with water to see there is no water leaking out from the bottom. It is time for casting. To reflect concrete material. I choose between plaster and hydro-stone to do the casting. Because plaster was slow to dry, it will take about 1 day, but hydro-stone takes only 30 minutes. Obviously, I'd choose hydro-stone. The ratio of this mixture will be 3 to 1. Then I measure the dimension that the volume of this mold is 1L. It means 330ml water and 1L hydro-stone powder. In order to gain concrete color, I added some black ink to the liquid to reconcile the color to like concrete. Because the mixture solidifies quickly, I need to keep stirring as the picture shows.
 |
| Keep stirring |
 |
| shaking the mold |
 |
| almost dry |
 |
| removal mold |
 |
| removal mold |
 |
| casting base |
It only takes about 20 minutes for the casting to dry out. The casting dissipates heat as it dries, and then I feel the model heating strongly when I touch the surface of the concrete with my hands.
(Tips: must be careful to add the powder to the water slowly instead of adding water to the powder.)
The second part is the laser cutting timber structure. (16 dollars plywood + 15 dollars laser cutting= 31dollars). As I mention before, I use laser cutting with the 6mm,3mm plywood board to cut columns and beams. Glue each piece together and form a structure. When gluing, the structure is not very neat because of the visual error, so we need to find a parallel place as a reference line. Connect each component together.
 |
| laser cutting columns and beams |
 |
| glue together |
 |
| final structure |
The third part is the facade.
My plan is to use ACRYLIC- Clear and then use sandpaper to sand the texture as a translucent material. However, the effect of the test is not ideal enough, and the materials on precedent are a little different.
 |
| testing facade |
Finally, I choose the POLYPROPYLENE of 0.8mm is selected for laser cutting. (4 dollars POLYPROPYLENE)
 |
| final chosen |
3.Final work:
The total budget is 86 dollars (31dollars+31dollars+20dollars (hydro-stone powder)+4 dollars)
 |
| all component |
 |
| structure |
 |
| structure with concrete base |

 |
| light on the bottom |
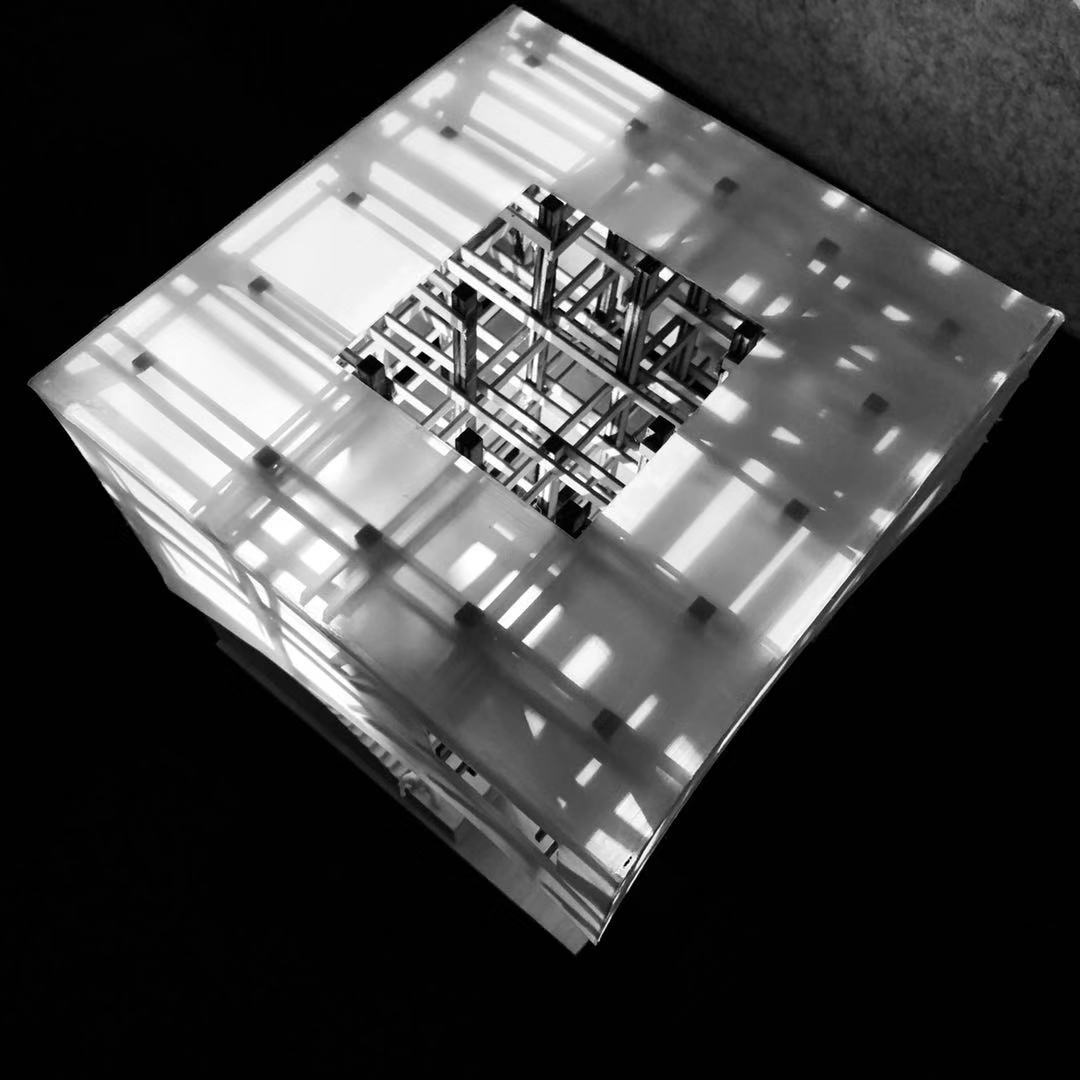 |
| top of the building |
2. Nest We Grow/ Detail model
1. Prepare stage:
This model is used to show a 1:5 joint model, which is one detail of the 1:50 model above, which is used to demonstrate how the column connects to the beam and support the structure.
The structure uses double beams interspersed with columns to support the whole building, so making this joint is a key detail to show the structure. in order to combine the 4 columns, it needs to use small pieces of metal panels connected in each component. The scale of this model will be 1:5. What I can find in the existing material is 3cm*3cm pine rod, which combines as a column of 6cm. Then cut the 3*3cm rod in half to get a 3cm*1.5cm beam.
 |
| model dimension |
2.Fabrication stage:
The model will be separated into two parts.
The first part using timber fabrication, I cut the rod and make the recess which dimension is 1.5cm*3cm*3cm.
Using the cutting machine, and finally, four timber rod is obtained. When I am cutting, I do not remove 1.5cm* 3cm *3cm directly, because I need to reserve the space 1-2mm for sanding it.
 |
| cutting small pieces |
 |
| sanding |
 |
| remove the useless part |
 |
| rod |
This step is trimming off the unused area to form a deep recess, and using a chisel to clean the surface. In addition, because there needs space to insert small pieces of metal planes between the timber, this timber rods should leave a gap about 1mm depth so that the steel plates can fix inside.
The second part is to make small steel plates, which are used to connect the column and the beam. The purpose of this model is not only to show the relationship between timber but also to show how to use these small components to connect beams so that the building structure can be work.
The steel plates are drawn, which is ready to cut. In a metal workshop, the machine is used to cut the steel plates as shown in the picture.
 |
| steel cutting |
 |
| preparing |
 |
| sample testing |
 |
| bending |
Four plates are required. Steel machine is used to cut the steel plates. I found that the four components were done in the same direction, but what I need for the plates that have two options, two opposite steel plates, but I do 4 the same direction of steel components. So I redo two steel plates in the opposite direction.
The next step is to use driller to drill 3mm holes on timber rods and steel plates.
If drill whole depth of this rod, I needed a 60mm screw to get through, however, I couldn't find a suitable screw in bunnings. I thought of replacing it with 3mm's steel rod.
 |
| steel rod and bolt |
 |
| preparing |
3.Final work:
Finally, the model is shown.
The total budget is 34 dollars (4 pine rods* 5dollars+steel rod 8 dollars+steel board 6 dollars)


3. Church of the Light/Tadao Ando
1.Prepare stage:
The third model is the early work of Tadao Ando, a Japanese architect. Light of church. What I focused on was the sinking space of the building, which had a prayer space and 9 steps to form a sinking room. After finishing the digital model on sketch up. I am going to focus on showing this sinking space with CNC technique.
 |
| digital model |
I use CNC technique to reflect the feeling of the base. The height of the staircase is 1.4m, so if the proportion selected is 1:50, the CNC height should be 28mm. One of the tips, Cnc can only cut off the circular chamfer, there is no way to cut out a right-angled border. The minimum amount of gap cut out should not be less than 4mm. So I set the 4mm wall width to accommodate the minimum thickness of this CNC. One of my problems is that it's hard to find timber, above 30mm in the square house. Unfortunately, I go to bunnings and spend 100 dollars on the timber. for me, it's over budget, but because I booked CNC on the next morning. I considered for a long time, I can still use this timber on my studio after I buy this expensive timber.
As I mentioned before the digital model is built, the file of rhino is prepared, each layer needs to be separated into a different color, and the CNC machine can recognize in different drills.
 |
| CNC base preparing |
When I doing the CNC, We have to keep an eye on the movement of the driller, and you may get stuck cutting and make a mistake on the machine. Unfortunately something wrong for setting, the machine got stuck when I record the video. I have no choice but to cut again.
 |
| CNC base |
It took an extra hour, but this time it was a free CNC. And finally, I got the base model. This base costs a total of 100dollars+50dollars (CNC one hour fee). After completing CNC, I use sandpaper to remove the impurities above the stairs.
 |
| CNC base |
The second part is the upper part of the church box. My original plan is going to use casting to make the model wall, but if the thickness of the casting wall is the only 4mm, it is too thin to break off. Then I discussed with one of the staff in the lab, I finally decided to use plywood to make walls. There are two reasons. One, in the base part, is to use timber to represent concrete, and then tutor suggested that the above church wall part is also represented by the same color of timber so that the color can be unified. Second, it is easy to save time to make the box wall.
It took a half-hour to laser cutting all the wall. I spent 41 dollars on cutting church box. (plywood 6MM---26 dollars + laser cutting time---15 dollars )
3.Final work:
Finally, it was glued together.
The main idea is to reflect the inner space, so the box is closed. When I was taking pictures, the sunlight coming into space, create some space feeling for this model.
 |
| whole model |
 |
| interior space |
In conclusion, after working on these three models, I have a lot to gain. I learned a lot of special techniques that are not usually used in my studio. I was a stranger to CNC when he didn't take this course. After completing the CNC, you will feel that you can still do the base model. This will be of great help to my later design. I can better present something I want to say. In addition, casting is a good technique for expressing materials. Especially some concrete materials. I think I can use my studio right now. Finally, timber and steel workshop. It was a great experience. I've never had this kind of experience before. These special technologies can inspire my potential for future design.

留言
張貼留言